


A Guide to Choosing
Your Next Monitor
Once regarded as a luxury reserved for tentpole films, flagship TV shows, and big-budget commercials, dedicated on-camera and on-set monitors have become indispensable for productions of all sizes and creators at every stage of their career. If you’re shopping for a new monitor, you probably already know that it’s not a one-size-fits-all decision. Today’s monitors come in a dizzying variety of shapes, sizes, brightnesses, resolutions, screen types, contrast ratios, and integrated software platforms—a lot of information you need to unpack to make an informed investment.
In this article, we’ll review features and terms you should know, explain how different monitors can enhance workflow for different shooting styles, help you identify the best solution for what you need right now, and look at factors to consider as your career evolves.
Investing in a monitor is a big deal, and you want to be confident in your choice and happy with your decision. We’re going to provide as much detail as possible in the sections below to make sure you have all the information you need to find the monitor that’s right for you. So buckle up—it’s going to be a long, scenic ride!
Let’s start with the basics—the main features to consider when shopping for a new monitor:
1. Size & Form Factor
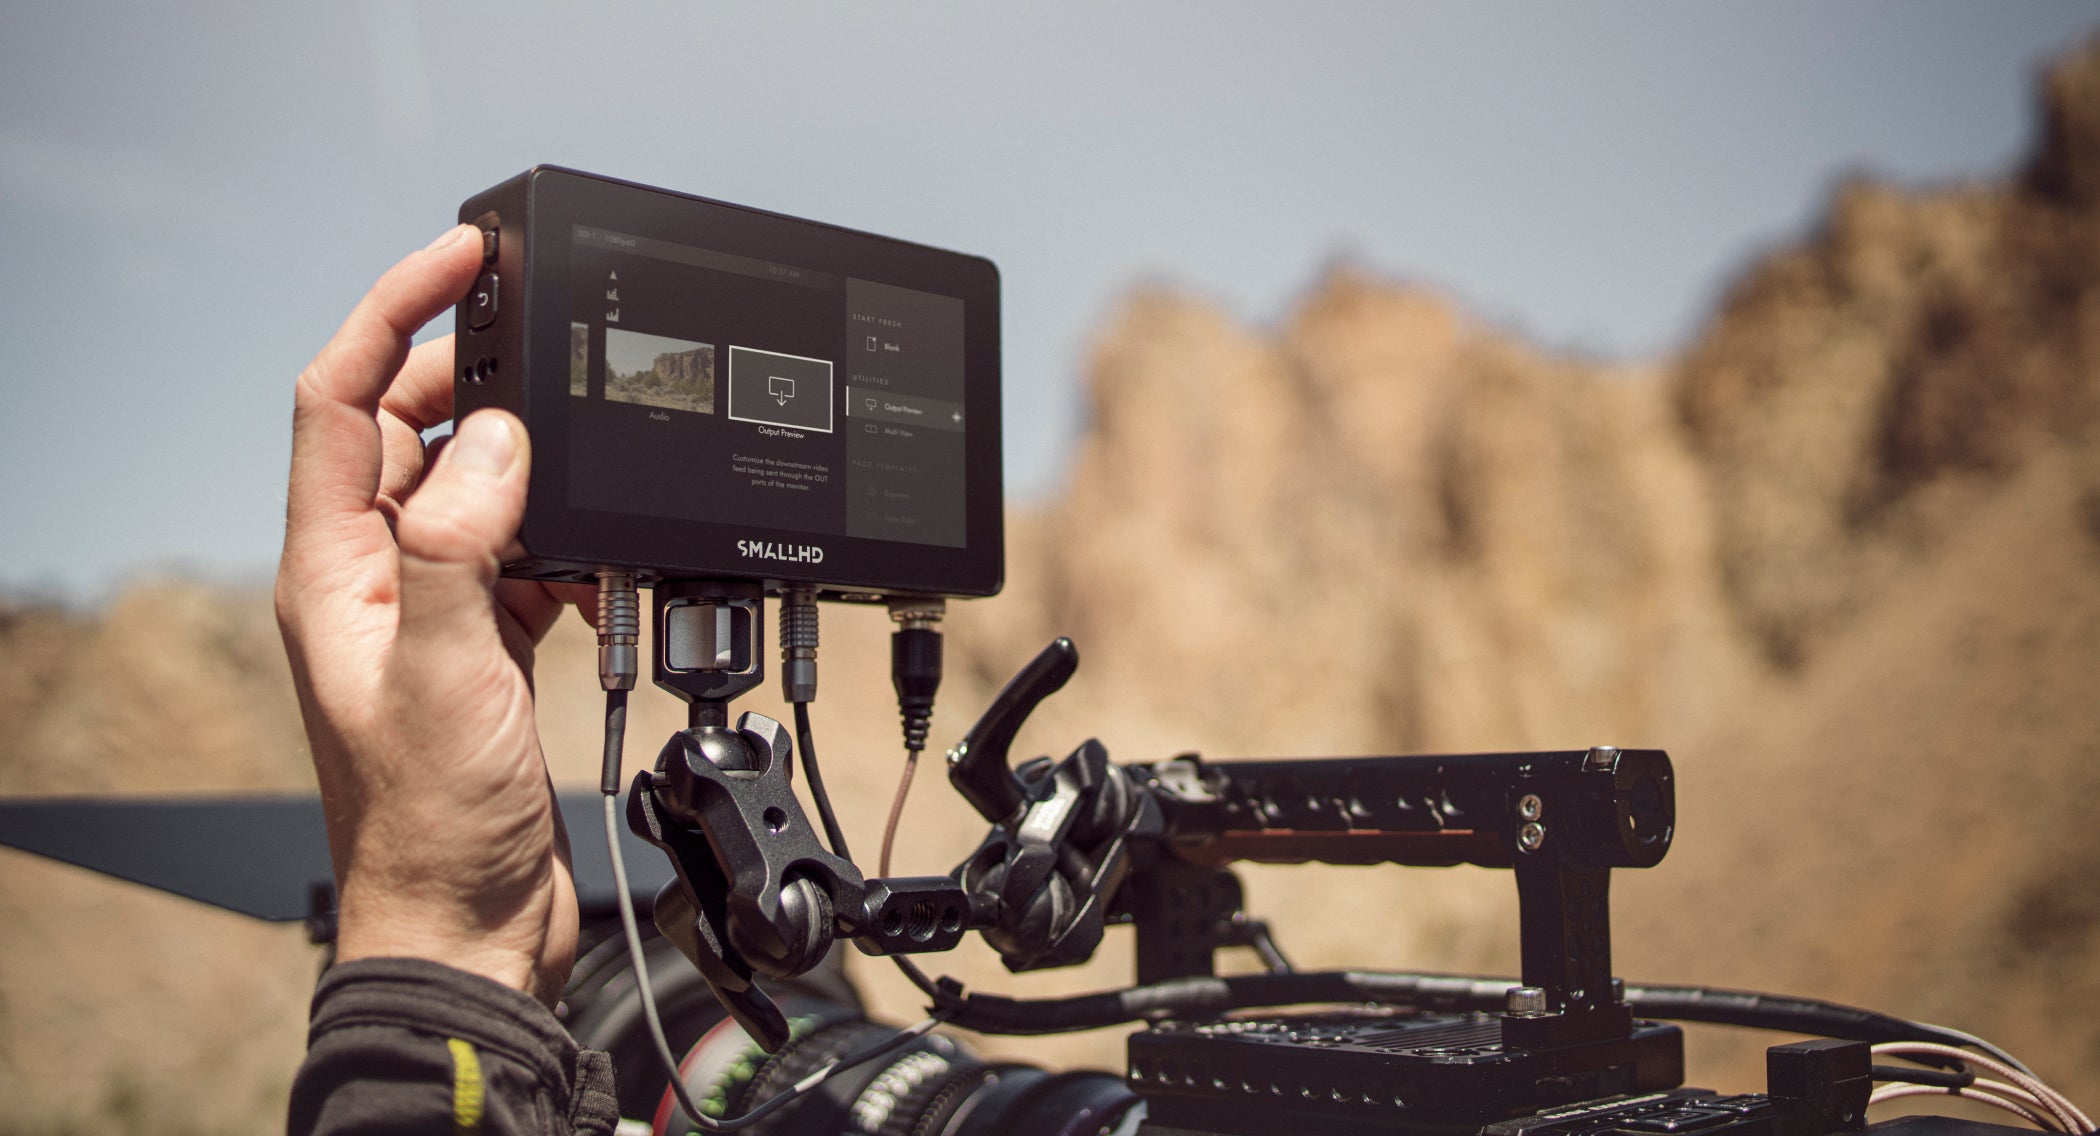
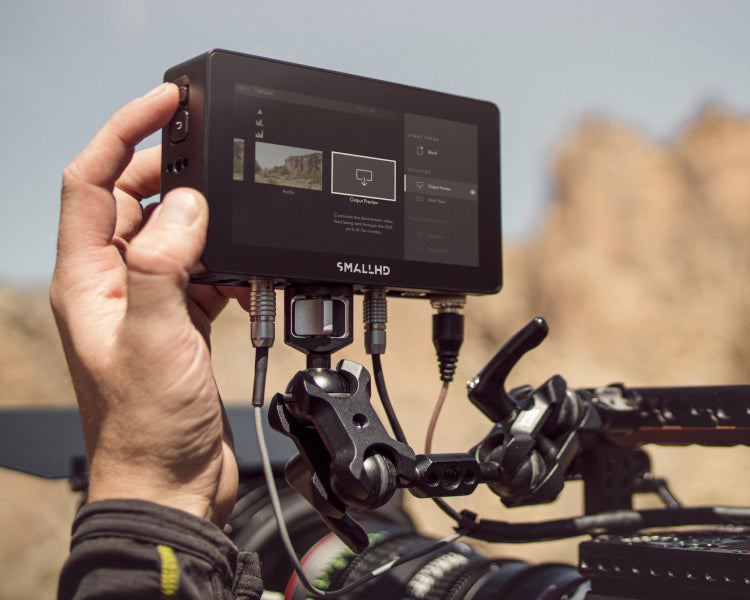
Size and user interface design are probably the most obvious considerations—ones you can see before you even turn on the power. Begin by thinking about how you’ll use your monitor. Will you be shooting on location where portability is key? Will you need additional screen area to pull focus? Will you mount your monitor on the camera? And if so, how big is your camera? Answering these questions will help you identify your personal checklist of must-haves, nice-to-haves, and not-for-me-thanks.
Here’s a helpful guide to finding your ideal size:
- 5-inch to 7-inch camera monitors are best suited for on-camera use. They offer more screen area than integrated camera screens so you can see your image in greater detail. They’re also light and portable enough to complement your rig without making it bulky or heavy. If stakeholders need to approve your image without being right next to you, you may want to consider investing in a handheld director’s wireless monitor system.
- 7-inch to 24-inch production monitors work well on bigger rigs, C-stands, and in remote-viewing setups.
- Production monitors 24 inches and above are mainly for video villages and post-production setups. Monitors of this size are reserved for more detailed work. They’re most commonly used as a director’s monitor, for color grading, or in a video village for multi-person viewing.
Beyond screen size, the form factor—or external design—of your monitor is also critical if you want the ability to customize your setup with optional accessories like handles, extra power, or additional mounting points. When shooting out in the field, being able to connect accessories directly to your monitor can prove game changing for your workflow. Adding additional power, connecting wireless receivers or lens control hand units that can be powered through your monitor will help to ensure that your setup is as efficient as possible.
These accessories all factor into the overall size, weight, and functionality of your rig, so be sure to consider the durability, construction materials, and functional design of the monitor to make sure it can adapt to your shooting style and production needs.
2. Camera & Connectors
The camera you use is also a key factor in what kind of monitor best suits your needs. Different cameras offer different connectors—usually High Definition Multimedia Interface (HDMI), Serial Digital Interface (SDI), or a combination of the two. If your camera’s connectors aren't HDMI or SDI, you’ll likely need adapters to convert to one of these standard signal outputs.
Many monitors offer both HDMI and SDI connectors, but some, especially entry-level monitors, are HDMI-only. The best way to maintain signal integrity is to ensure that your monitor has the same connectors as your camera. This will avoid interrupting your signal path and save you money on adapters. If you’re looking to future-proof your setup, you’ll want a monitor that has both HDMI and SDI connectors. This will ensure that your monitor can handle all your current work while being able to adapt to any shoot you book in the foreseeable future. Aim for versatility—especially when starting out as a freelancer, like most filmmakers do—so that you can connect to any camera and work with both signal types.
While we’re on the topic of signals, you might want to get acquainted with the term "looping,” also referred to as "pass thru." This refers to taking the SDI or HDMI input signal into the monitor and passing/looping the same signal out again. For example, you could use the pass thru/loop thru on your monitor to share the input signal with a Teradek transmitter. One way we use looping in our studio is to connect two 17" monitors via SDI. The video feed goes IN one monitor and that monitor shares the signal by passing it OUT via SDI to the next monitor. The difference between "looping" and "cross-conversion" is that the latter "converts" HDMI to SDI (or vice versa), meaning you could send an HDMI signal to your monitor from an HDMI-only camera and output SDI to your SDI-only downstream device. This knowledge is valuable as you start to connect additional devices to your workflow.
Let’s take a look at the difference in signal outputs between HDMI and SDI:
HDMI
HDMI is usually standard on consumer/prosumer cameras, making it more common overall, while SDI is more typical on pro-level setups. HDMI signal strength begins to degrade in as little as 50 feet, but can nearly match SDI’s range of 200–300 feet with extenders and/or repeaters—devices that clean up and boost cable signal over longer ranges. But keep in mind that the more connectors/extenders you add, the more opportunities there are for things to get dislodged and compromise your signal, so plan ahead!
SDI
SDI is the professional, industry-standard format. It has specialized BNC connectors on each end that lock into place and can carry an unamplified signal over much longer distances than HDMI—up to 300 feet. Because BNC cables and connectors are more secure, durable, and easier to repair than HDMI, SDI is recommended for live events where you can’t afford to lose signal.
A quick guide to different SDI bitrate standards:
- 3G-SDI is optimized for Full HD (1920x1080)
- 6G-SDI lies between Full HD and 4K and can pass a 4Kp30 signal; the industry has moved to 12G-SDI, as many productions now prefer to monitor at 60 frames per second in 4K resolution
- 12G-SDI is the industry standard for sending 4K signal
Bottom line: SDI is more reliable, secure, long-range, and best suited for challenging filmmaking environments. HDMI is appropriate for shorter cable runs and connecting to nearby monitors, laptops, or TVs.
Power
Your monitor should ideally offer options for both external battery and AC power. Some monitors offer hot-swappable battery plates, allowing you to quickly replace drained batteries so you can get back to shooting. Other monitors can centralize your power supply with pass-through ports that allow your monitor battery to also power your accessories, like the SmallHD Cine 13, which has 2x 2-pin locking power outputs for powering external devices.
Let’s talk about batteries for a second. Typically, large, professional Gold Mount or V-Mount batteries from a leading company like Anton Bauer will have a higher capacity than batteries that come standard on monitors, which is why these industry-standard batteries are better for shooting on location. Portable, lightweight monitors often use either the Canon LP-E6 or Sony L-Series battery. For larger professional production monitors, you'll want either Gold Mount or V-Mount batteries, or even a block battery like Anton Bauer’s VCLX that can run uninterrupted from the first shot to lunch. Gold Mount batteries get their name from the round gold locating pins and V-Mount batteries get their name from the v-shaped locating mechanism. The term “hot-swappable” indicates a dual-battery input that allows you to swap out a dying battery for a fresh one without interrupting the power supply.
3. Color Space & Bit Depth
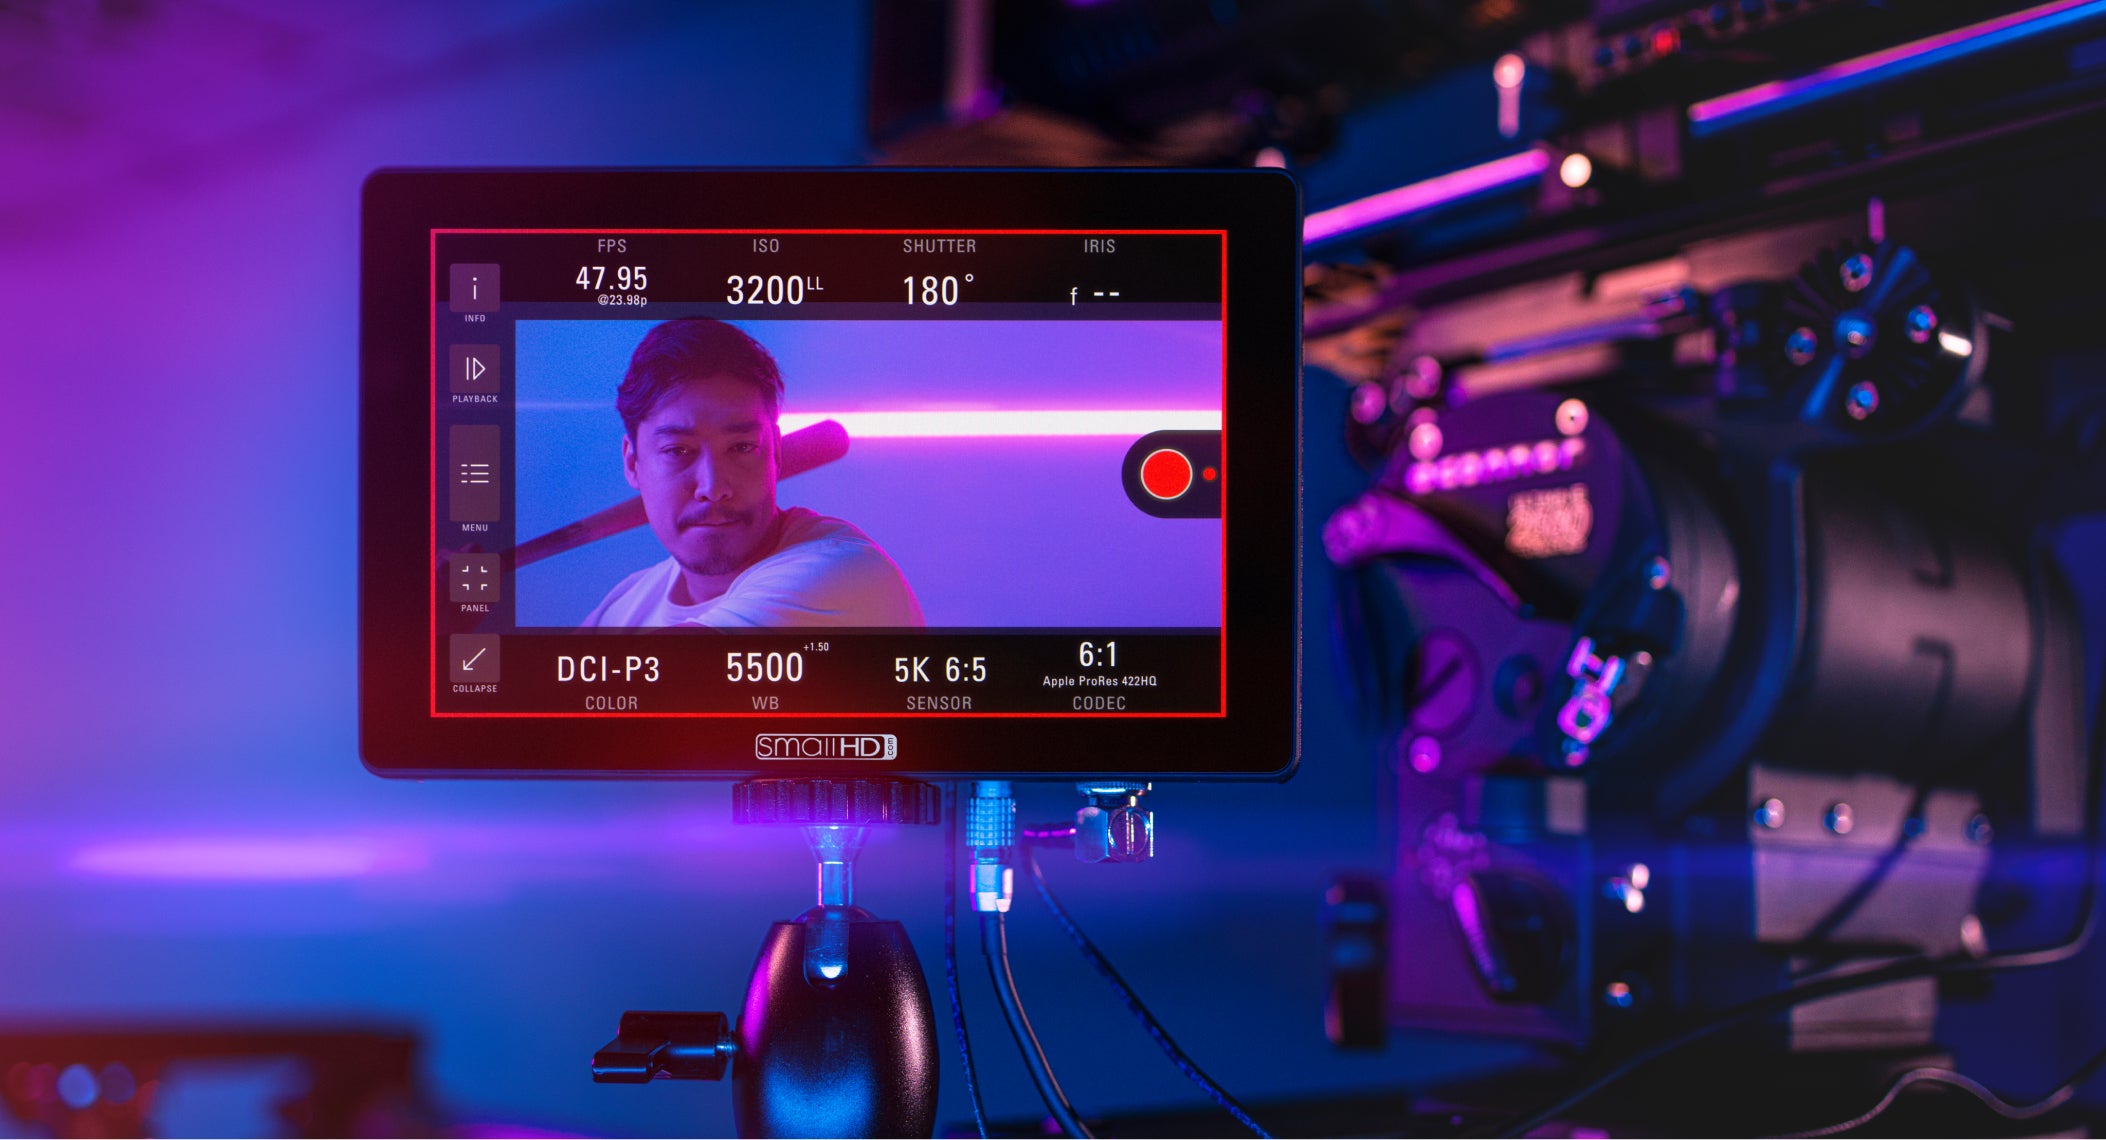
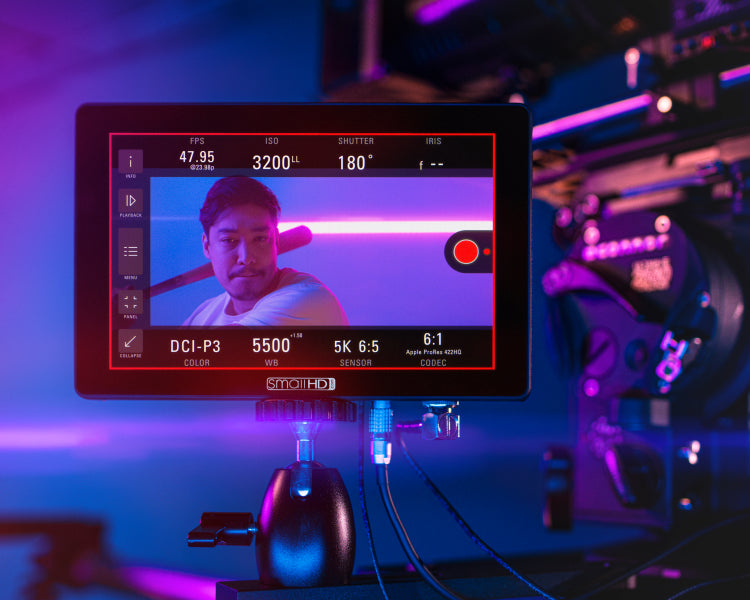
The theory and practical application of color space (or “color gamut”) is a deep topic with a long history. We’ll keep it relevant and focus on the types of color space offered by monitors, specifically Rec. 709 and DCI-P3.
But before we get into color space, let’s quickly address the topic of HDR, a term you’ve likely encountered in discussions about televisions and/or monitors.
What is HDR?
HDR is the acronym for “High Dynamic Range.” The dynamic range is defined as the difference in luminosity between the brightest and darkest areas of your image. “High Dynamic Range” enables you to see a larger range of colors on your screen. These colors appear more vivid, the highlights are brighter and clearer, and the shadows have more depth. Some monitors, like our Vision Series, can display True HDR images while others offer excellent HDR Previews, like our OLED 27.
The goal of HDR on set is to match the final image seen by the viewer as closely as possible. Nearly all content today is finished to HDR specifications in post-production, so the closer your on-set monitor renders detail the way you’ll see it in post, the less likely you are to miss crucial details that might require a reshoot. In a world where content is viewed on larger and more capable home televisions, notebook computers, and even HDR-capable mobile phone displays, HDR monitoring on set helps ensure that no unwelcome surprises are lost in the shadows.
Rec. 709 vs DCI-P3
Put simply, Rec. 709 is the color space used for the HDTV transmission standard, and DCI-P3 is the color gamut originally created for use in the theatrical film industry, particularly for digital cinema projectors. The main difference is that DCI-P3 displays deeper green and red tones than Rec. 709, but blue tones appear with the same consistency.
The best way to decide which monitor’s color space best suits your needs is to consider how your audience will watch your content. If you’re shooting web content or for broadcast television, Rec. 709 is usually the way to go. If you’re shooting a movie that will screen digitally in theaters or on HDR televisions, DCI-P3’s larger color palette will be more appropriate. Seeing what the audience sees is a clear advantage when your creative vision depends on nuanced color balance. While post-production includes color grading and VFX, the more closely your on-set monitor reflects the final product, the fewer unexpected surprises you’ll encounter in post.
For HDR finishing, the color space question becomes much more complicated. But if there is a ‘most-common’ finishing standard for HDR, it’s the DCI-P3 color gamut with its D65 white point and PQ curve. That said, HDR transmission is nowhere near standardized, and many studios currently have their own unique finishing specifications for final publishing.
Some monitors leave it to you to figure out your monitor settings and make sure that you’re operating in the right color space for your production. But SmallHD has a unique feature called “Color Pipe” to simplify your color space setup. Just tell Color Pipe what type of signal is coming in each input (usually Log-based), and then set it to display in HDR or SDR for complete control of your monitoring color space and curves.
Bit Depth
Now let’s discuss bit depth—the amount of color information stored in each pixel of data. Monitors typically offer 8-bit, 10-bit, 12-bit, and 16-bit options. The higher the bit depth, the more information can be stored in each pixel, resulting in richer colors and more dynamic tones.
An increase in bit depth exponentially increases the amount of RGB colors that can be displayed. Here’s a quick guide to the number of viewable colors at each bit depth:
- 8-bit: RGB — 256 levels per channel (16,777,216 colors)
- 10-bit: RGB — 1024 levels per channel (1,073,741,824 colors)
- 12-bit: RGB — 4096 levels per channel (68,719,476,736 colors)
Dithering
Dithering is a technique you can use to blend colors at a lower bit depth by introducing random noise to the image in strategic locations. This is a common practice in small monitors. It is common to use an 8-bit 7” panel with dithering to 10-bits. This is generally imperceptible to the human eye and allows you to experience a 10-bit image without the extra cost. Very few small displays have actual true 10-bit color.
4. Resolution
Video resolution indicates the amount of detail in your video and how realistic and clear it appears. When comparing monitors, resolution is the most obvious visual differentiator along with brightness. In terms of pixels, HD resolution is 1920 pixels x 1080 pixels; UHD resolution is 3840 pixels x 2160 pixels; and DCI 4K resolution is 4096 x 2160 pixels. If your camera outputs a 4K signal, a 4K monitor will give you the most accurate image representation. If your camera outputs 4K and your monitor displays at a lower resolution, depending on your signal workflow, you may need to configure your camera output to downscale to HD.
If you’re not quite ready to pull the trigger on 4K, look for a monitor with at least full HD resolution that has some 4K video input options. Even when purchasing a Full HD monitor, look for 4K-compatible monitors like the Smart 7 Series. While they’re Full HD monitors, they can ingest a UHDp30 signal via HDMI and employ 1:1 Pixel Mapping to let you utilize the full video signal resolution. 1:1 Pixel Mapping displays an input source without scaling it, so each pixel received is mapped to a single native pixel on the monitor. The ability to zoom in 100% allows you to maintain image integrity, ensuring that your image is always crisp and in focus.
As a side note, our Cine 7 is a 7” monitor with Camera Control functionality, allowing you to view and adjust the settings of popular cameras through the monitor’s UI—specifically RED® RCP2 (KOMODO®,V-RAPTOR™), RED RCP (for DSMC2® and most features on DSMC), ARRI (ALEXA MINI, ALEXA MINI LF, AMIRA), and Sony VENICE. To learn more about camera control watch this video.
4K resolution monitors are here to stay, and with more productions transitioning to a 4K workflow, investing in a 4K monitor might be a smart way to future-proof your system.
Key points to keep in mind when it comes to resolution:
- Just like HDR viewing, being able to monitor in 4K on set is all about trying to replicate what people are seeing at final delivery. This ability is becoming more critical now that more people watch 4K content at home.
- 4K resolution is essential for roles where you need to see fine detail, like focus pulling. This is especially necessary with the trend of large-sensor cameras, since they create even greater depth of field. Maximum detail becomes critical to ensure you hit your mark every time.
5. Brightness
The brightness of your monitor can make or break your shooting day when you're on location or anywhere with unpredictable lighting. As a rule, high-brightness monitors are ideal for shooting outdoors. The sun is the biggest, best key light on the planet, but it can also be your worst enemy when you’re trying to review your shot.
Monitor brightness is measured in nits. One nit is equal to one candela (one candlepower) per square meter. 1000nits of brightness is considered daylight-viewable, so if you shoot outside a lot, aim for this or higher. If you already have a low-brightness monitor, say around 300nits, you may want to purchase a compatible accessory like a sun hood to help you review shots in brighter environments.
Note of caution: keeping your monitor consistently at the highest brightness will drain your battery’s charge more quickly, so remember to adjust brightness as needed or keep extra batteries nearby. Brightness can also impact image quality and color reproduction, so you’ll want to find quality monitors—like SmallHD—that retain reliable image integrity and color reproduction on their daylight-viewable displays.
You’ll also want to compare contrast ratios when researching new monitors. The contrast ratio is the difference between the brightest white and the darkest black of your image. A contrast ratio of 1000:1 means the brightness of a completely white image is 1000 times greater than the brightness of a completely black image. Dynamic contrast ratio is when the blacks and whites are measured at different brightness levels, producing a range of contrast as opposed to a static number defined at a specific brightness level.
Viewing angle is another important consideration (it’s not exactly brightness-related, but we’re going to squeeze it in here anyway). Just imagine a scenario where you can't view your monitor head-on or you’re reviewing a shot with other people and you’re all looking at it from a different angle. Simply put, the larger viewing angle your monitor offers, the easier it will be to see a quality image representation from the side. Ideally, your monitor’s viewing angle should be as close to 180 degrees as possible, but depending on the display technology in the monitor, a perfect viewing angle may not be possible, nor is it always necessary. One more note: Even though a spec sheet may claim a 180-degree viewing angle, it does not mean there is zero color shift when viewing off-axis.
6. Software Tools
The software tools available on today’s monitors are game-changers. Common tools like focus assist and false color now come included on many entry-level monitors, and it’s impossible to imagine a world without them. But just because a monitor has a tool does not mean that tool is accurate or useful. For example, you might buy a monitor with a waveform tool, but its slow refresh rate renders it practically unusable. It’s important to make sure that whichever monitor you invest in, it includes the tools you need and a user interface that aligns with your workflow and can evolve with your career.
SmallHD prides itself on powerful, accurate software tools and UI/UX integrated into every monitor we manufacture. To learn more about our intuitive toolkit, learn more about the latest PageOS 5.
Here’s a look at the most common monitor tools:
- Waveforms: Review voltage over time and the “shape” of the signal; examine luminance
- 6G-SDI lies between Full HD and 4K and can pass a 4Kp30 signal; the industry has moved to 12G-SDI, as many productions now prefer to monitor at 60 frames per second in 4K resolution
- Pixel Zoom: Punch-in on a live image to zoom in and identify exact focal distances; evaluate objects for framing and composition; analyze fine details
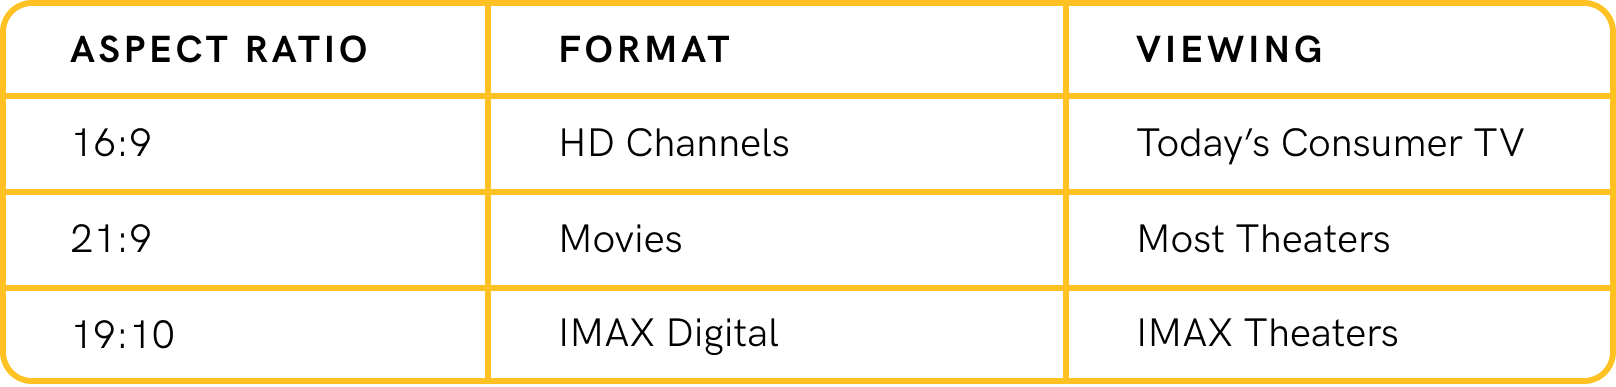
- Aspect Ratio Guides: Define the proportions of your image with a width:height ratio; ensure correct framing
Here’s a quick guide to some common aspect ratios:

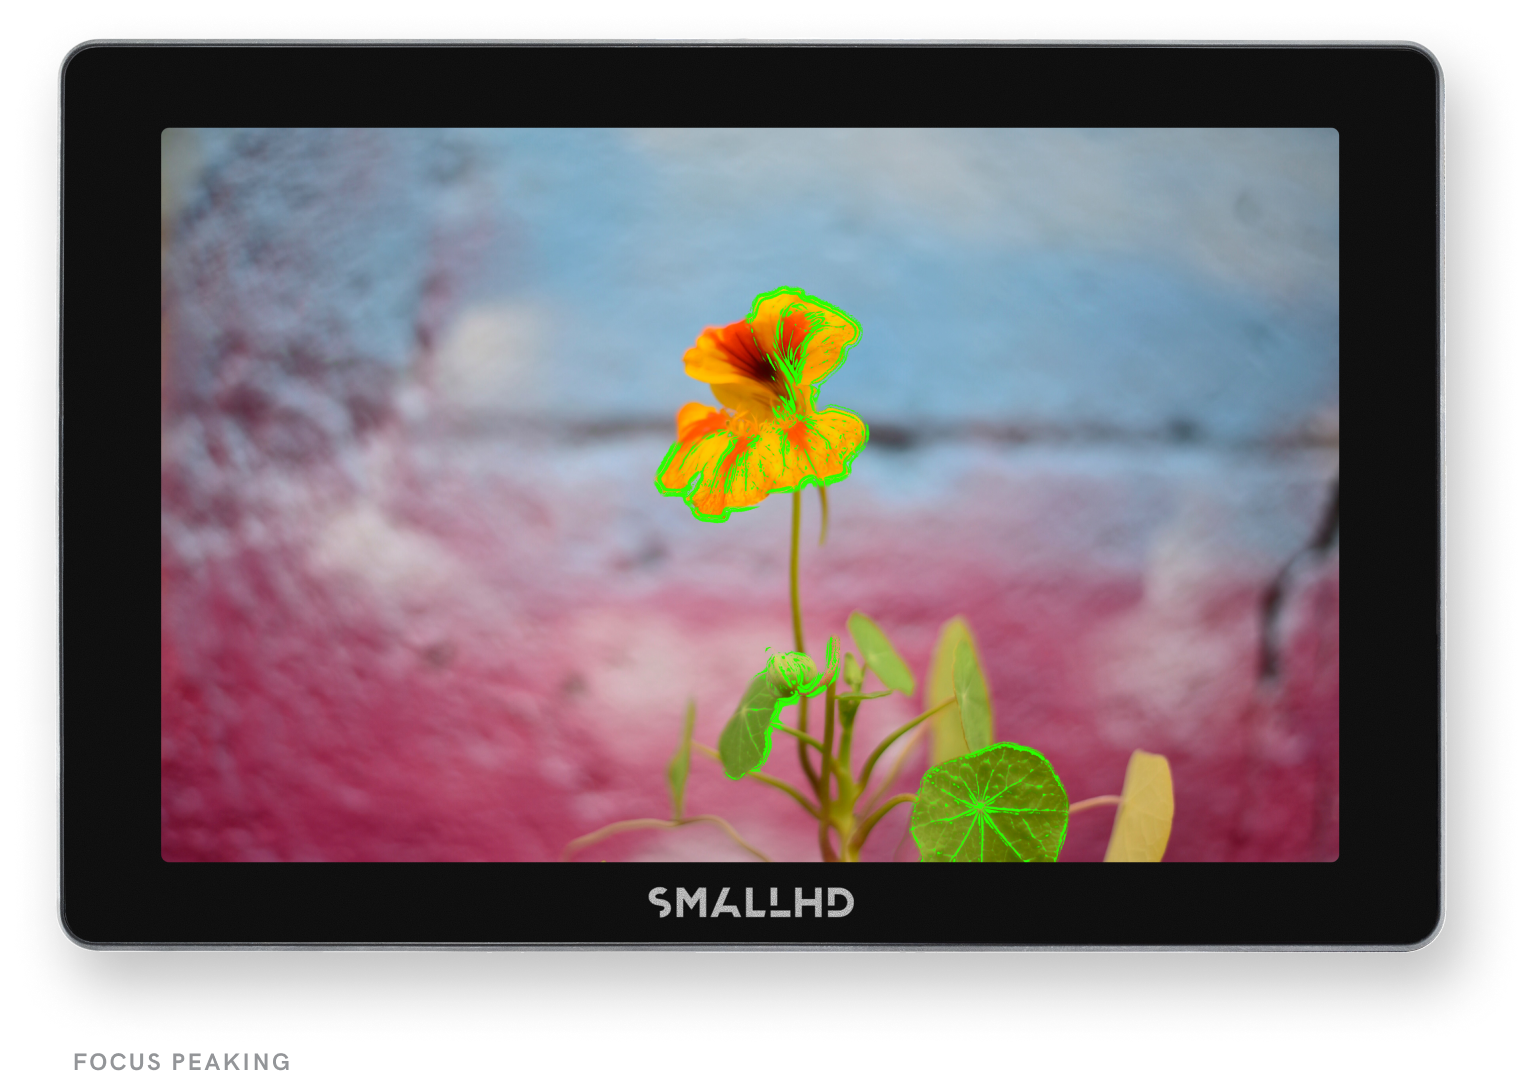
- Focus Assist: Identify in-focus objects with a colored highlighted overlay that illuminates hard, crisp edges; confidently make focus adjustments with a very shallow depth of field
- Vectorscope: Measure the color information in a video image to make sure color, saturation, and balance are all where you want them to be
- False Color: Identify skin tone, highlights, midtones, and underexposed zones within an image to understand your exposure scale
- LUT Support (custom and built-in): Quickly preview what your footage will look like in post-production by applying a LUT in your monitor (a LUT, or “Lookup Table,” is a conversion table that lets your monitor transform your camera’s color input values to the designated output values of your final footage) Peaking Tools: Display contrast, outlines, or colors to assist with focusing—similar to Focus Assist, but allows you to retain full color in your image; in PageOS, simply observe more drastically highlighted edges for an accurate focus indicator
- Peaking Tools: Display contrast, outlines, or colors to assist with focusing—similar to Focus Assist, but allows you to retain full color in your image; in PageOS, simply observe more drastically highlighted edges for an accurate focus indicator
Ultimately, your workflow and shooting style will best inform which monitor tools you need now and which might come in handy down the road. Like any investment, it’s also about striking the best balance between performance and price point.

Good Luck & Happy Creating!
Whether you’re looking for your first on-camera monitor or trying to find the perfect 4K production monitor for your next big project, there will always be plenty of factors to consider. Some of them will be straightforward for everyone, but you’ll also want to check a lot of boxes that are solely based on your production needs, unique shooting style, and how you want your career to evolve. This beginner’s guide is a great way to get better acquainted with some key features, functions, and form factors available today and a glimpse at what’s possible as you build your creative future. Happy creating!
Reminder of key considerations:
- Size & Form Factor
- Camera & Connectors
- Color Space & Bit Depth
- Resolution
- Brightness Tools
Sign Up for Updates on our Newest Products